
Make a Harlequin 128 ZX spectrum from a kit!
If you're reading this page then you probably already know what a ZX Spectrum is. Back in the 80's the ZX Spectrum was one of the most popular home computers around, these days there is a huge amount of software freely available for instant download. A thriving global community continues to support the ZX Spectrum, spare parts and new add-on's are still being developed and sold on-line. These days you can even connect your original ZX Spectrum to the internet!
Today it's entirely possible to scratch build a new Z80 powered ZX Spectrum 'compatible' computer from a kit of parts! All the required items can be purchased from various websites stores allowing you to make a new example of this fantastic little 1980's computer.
On this page I will share my experience of building this kit and how I made a 'new' ZX Spectrum for the fun of doing it.
ZX Spectrum build concept
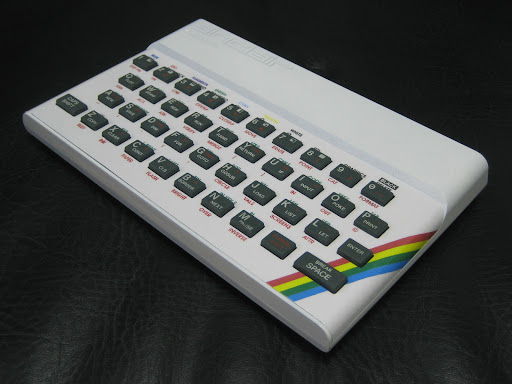
This project is based on the Harlequin 128 ZX Spectrum kit, as supplied by ByteDelight.com. When completed this PCB will fit in to most original ZX Spectrum cases, new cases are available from many vendors online. Harlequin supply either a 48K version or a 128K version of the ZX Spectrum. The boards are interchangeable, the 48K version has an internal speaker!
On both kits the RF modulator has been removed in favour of an RGB output. Other useful functions have also been added to this modernised version of this 8-bit micro. Go to the ByteDelight website for more details.
I purchased the 128K version for my ZX Spectrum build project.
What you'll need to build a ZX Spectrum
All of the items are available for multiple sources on the internet. For me, most of the items arrived within a week or two, no problems at all.
Main parts:
- Harlequin ZX Spectrum kit
- ZX Spectrum case
- Keyboard membrane
- Rubber key mat
- ZX Spectrum facia
Ancillary parts:
- 9V PSU
- Composite RGB lead
Other recommended part:
- 3.5 mm Jack lead to your PC or tablet to play .zxt files
- Optional SD card dick drive
- Optional HDMI interface
Tools:
- Soldering iron
- Solder
- Multi-meter with diode test function
- ESD protective mat and strap etc.
- Cutters and pliers
- Screwdriver
- Mobile phone with a camera, magnifying glass or great eyesight
- Good lighting


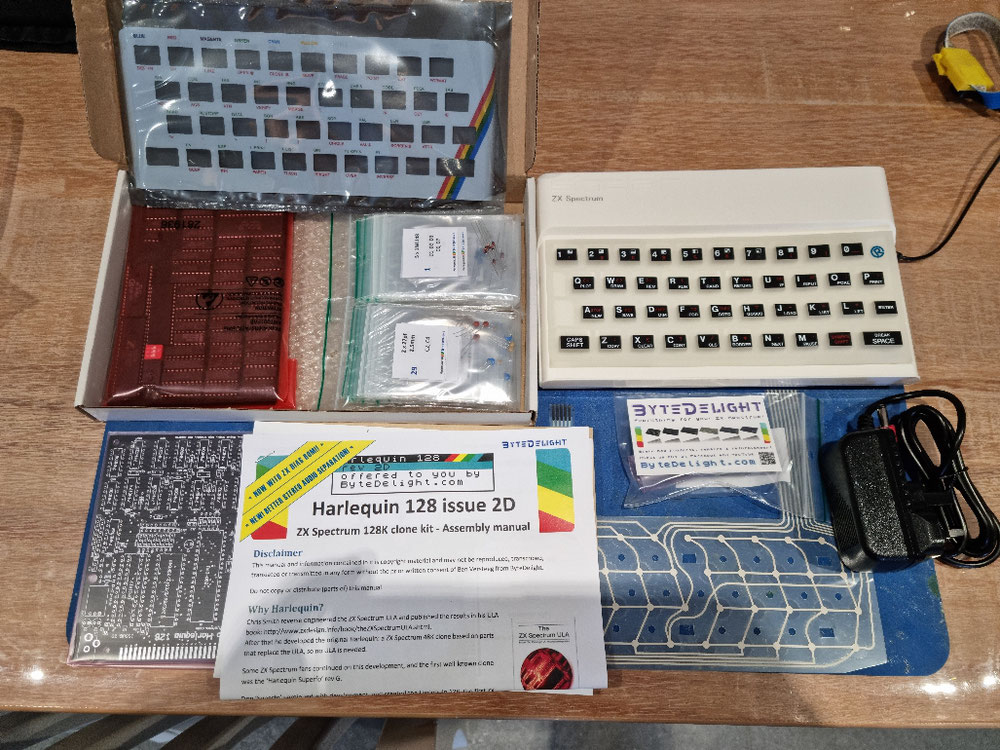
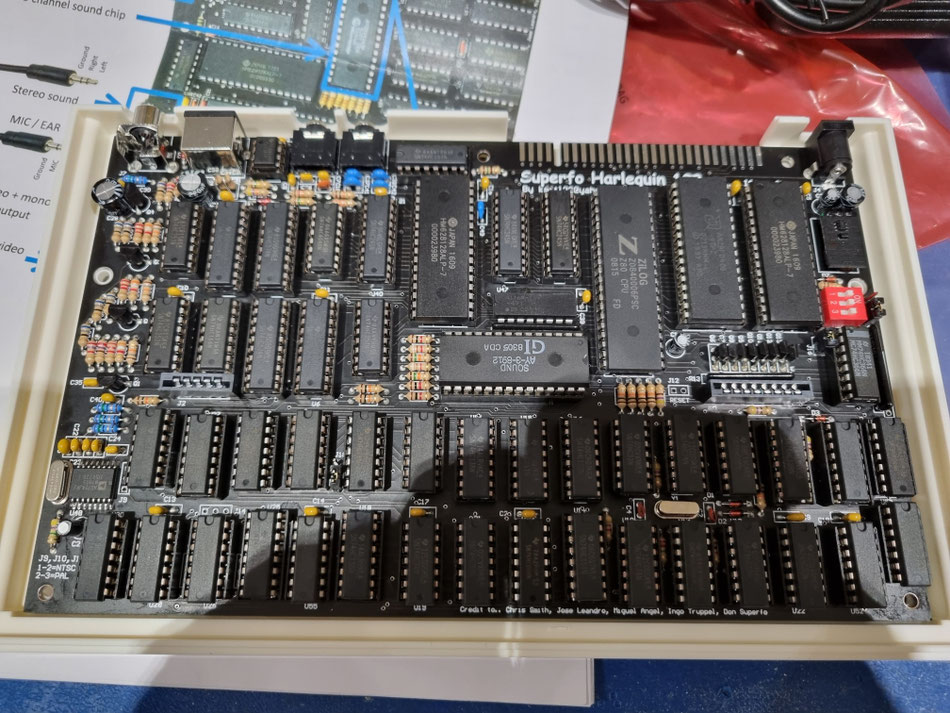
The 8 bit computer kit from ByteDelight
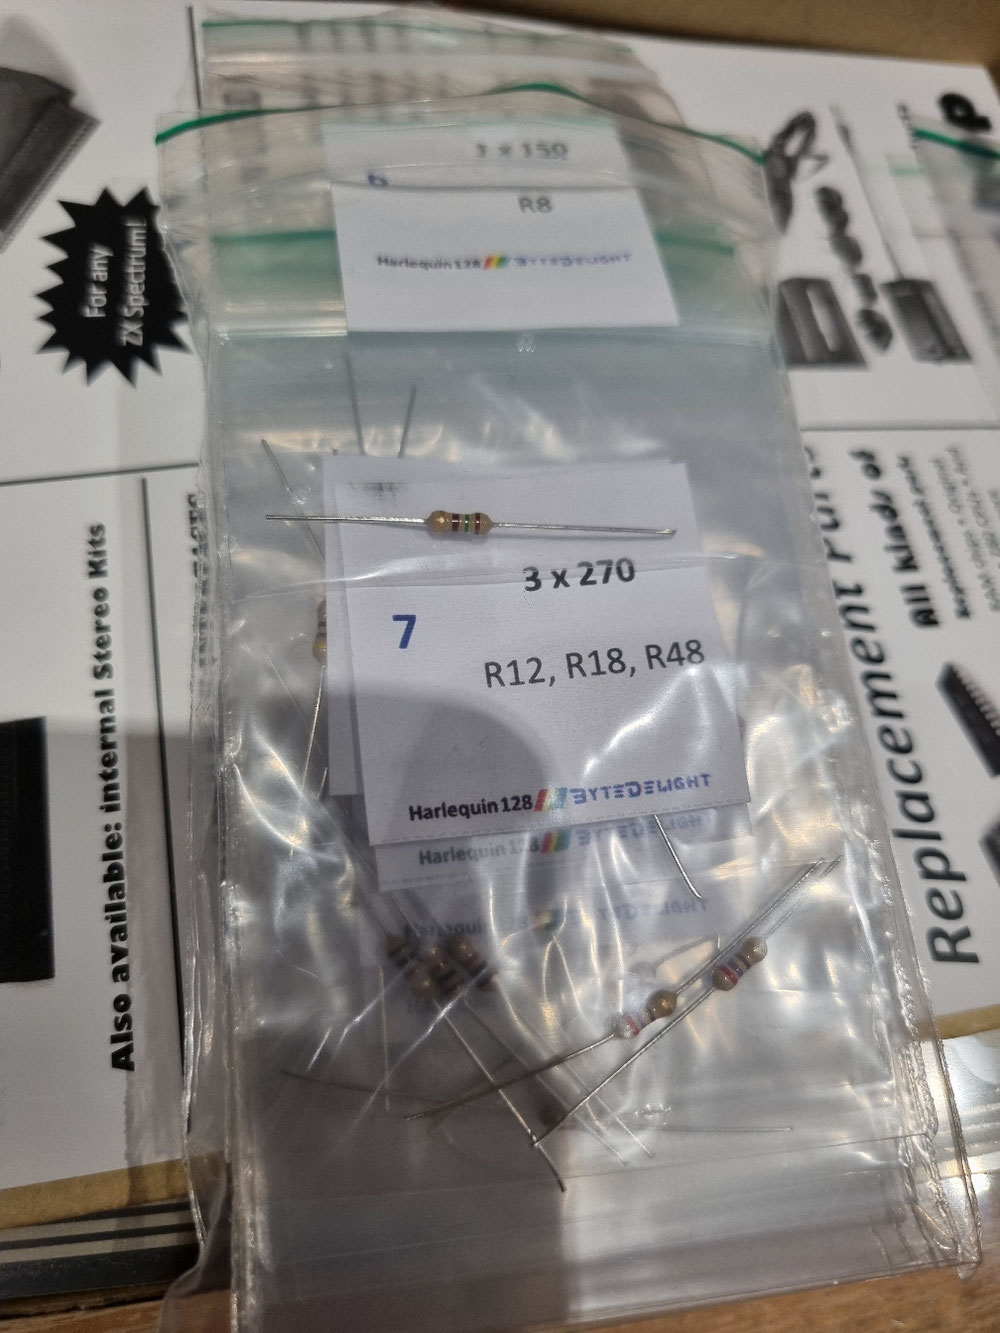
The Harlequin kit provided by ByteDelight is excellent. All the competent are individually packed by build step. These packs of components are then again packaged together and presented in the required build order. The documentation is of a very high standard, clearly laid out and broken up into logical steps, making the build a very enjoyable experience.
Assembling the board
This kit took about 10 hours to complete for me. Working a couple of hours at a time over a number of days. Good ESD precautions were taken, ensuring that an ESD mat and strap was used at all times. Good lighting, solder, iron and care is essential.
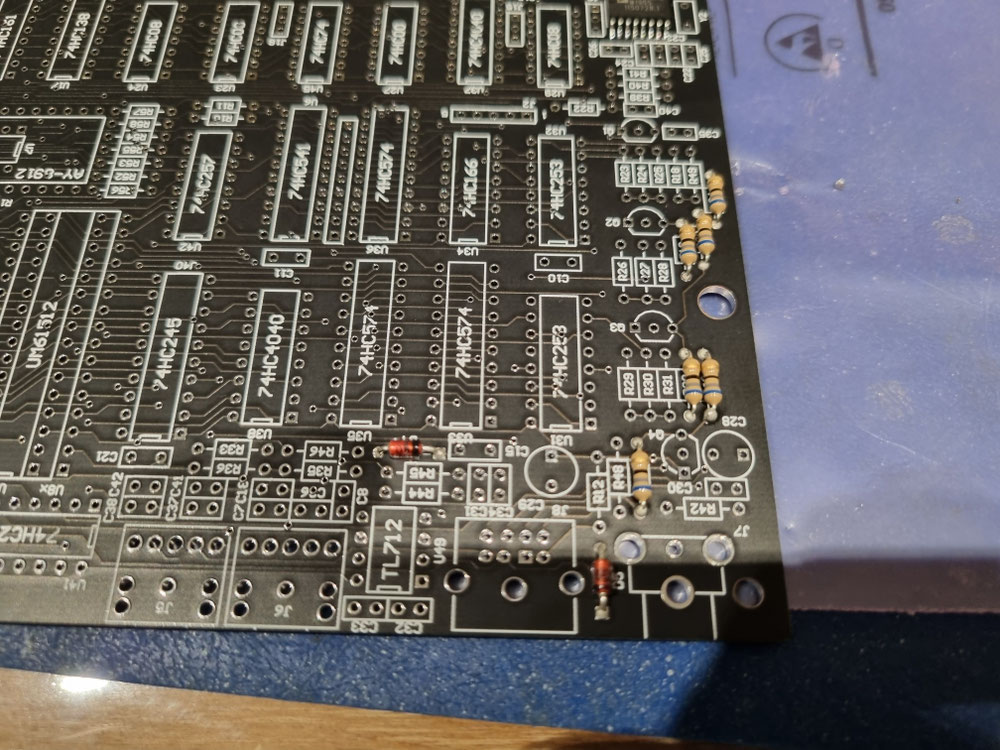
I fitted one component at-a-time. The process was to locate the components position on the PCB, check it's position against the instructions, solder, and check again. This is a job best done slowly. It would be very easy to miss-place a component or make a bad solder joint etc. So I worked with caution, I did not want an issue later on.
Some of the component numbers on the PCB had been obscured by via holes, so crosschecking with the instructions was essential.
Tricky build points
- A bunch of transistors are close together. Solder can bleed through the board if care is not taken. Also polarity could be an issue.
- Two resistors C34,C31 stand up high. This makes seating other components harder. I would recommend fitting these last.
- Some silk screen numbering can be obscured by via holes. Double check the passive component locations when in doubt.
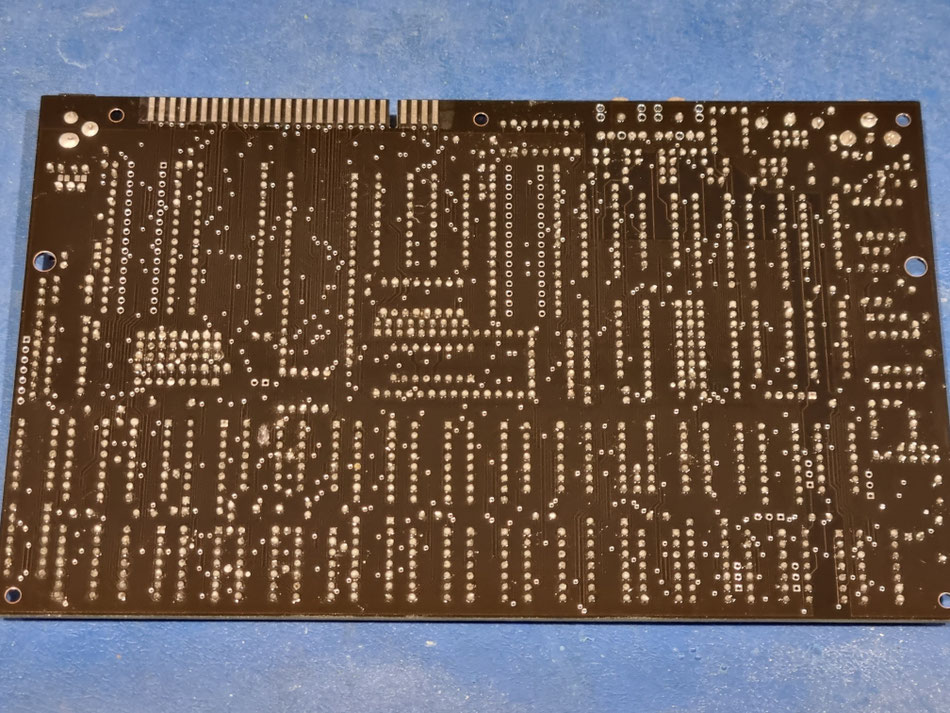
- The board tracks are very fine and delicate. Protect the board from damage, knocks and scrapes!
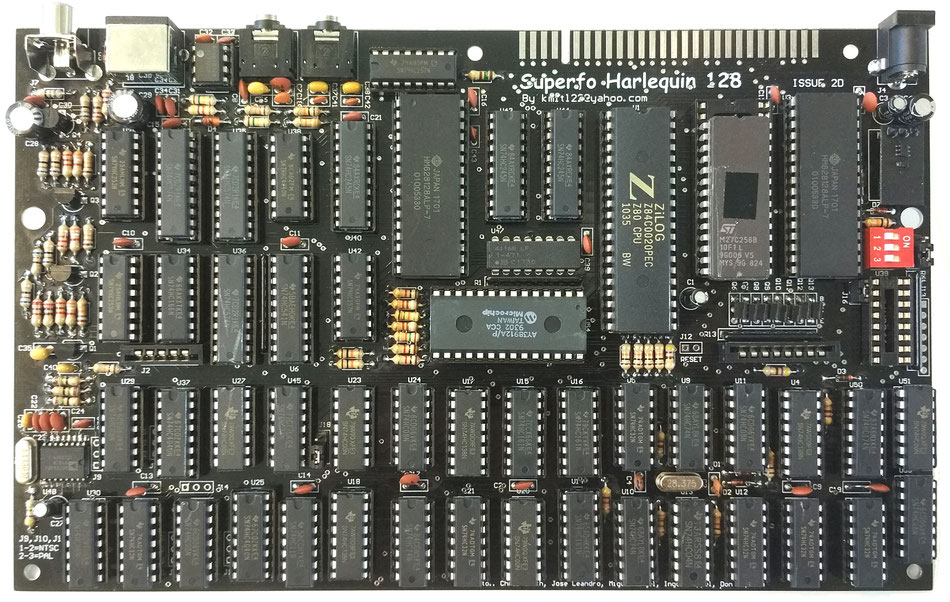
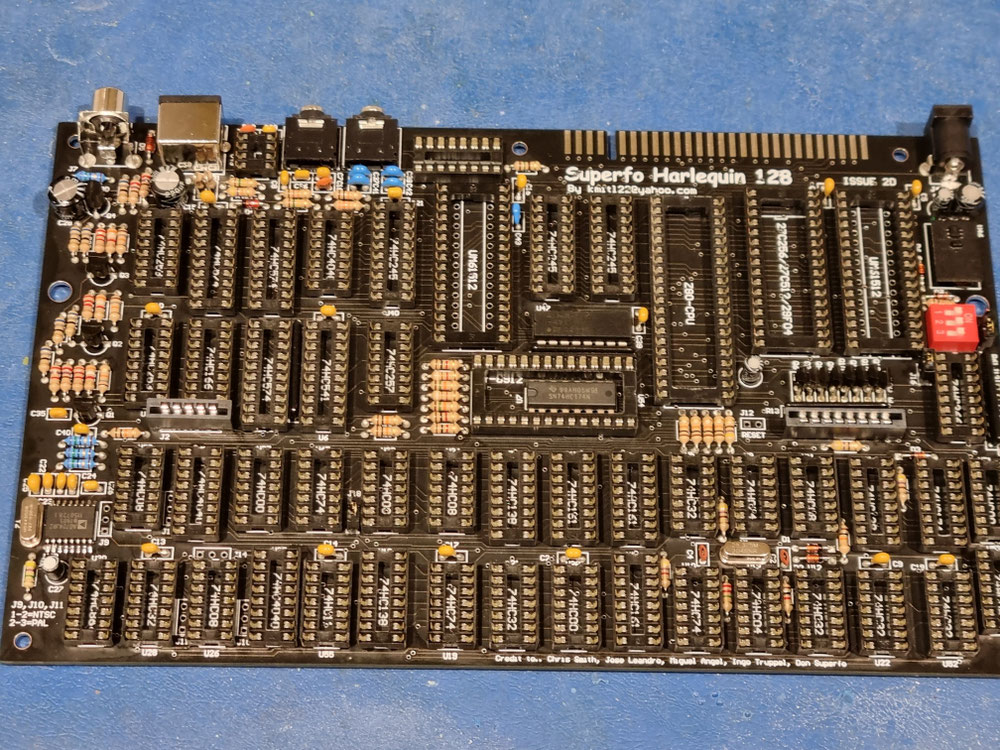
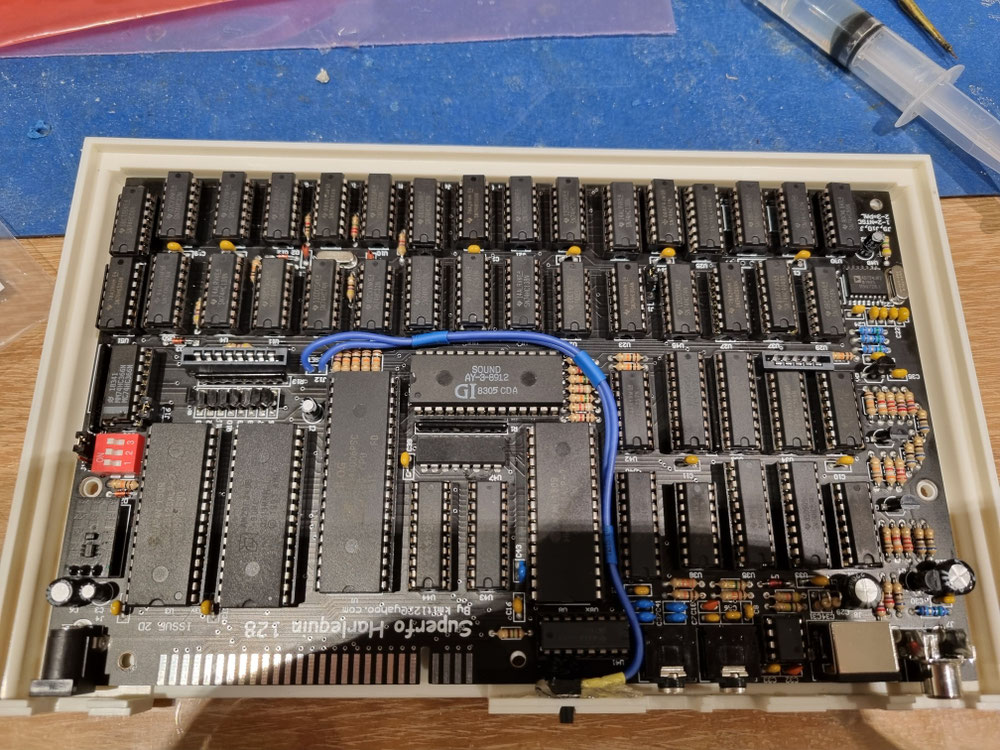
The completed board
After many hours of very careful work, the board was completed with all the parts fitted to the board.
The finishing touches
I cleaned the board using flux cleaner. Double checked all the solder joints and component placement. Once happy I applied a light coat of automotive lacquer. This is not needed but it made the board look fantastic!
Fitting the IC's
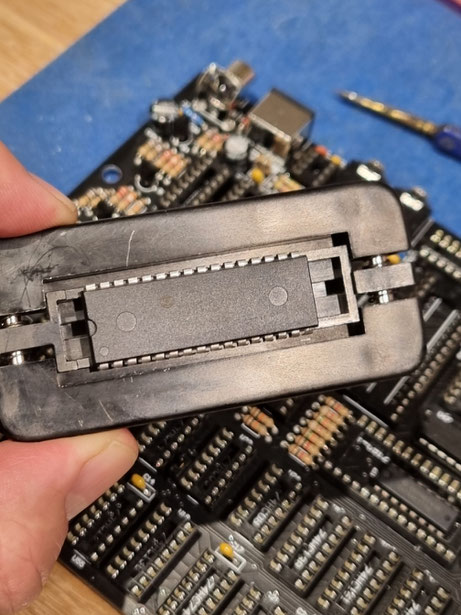
Again, when fitting the IC's great care is needed to get this right first time.
Although the IC pins came pre-bent in the kit, they did require extra bending by using an IC leg bending tool!
Tip: If you are having to use any sort of pressure to insert the IC then something is wrong. Remove it, give it a squeeze in the tool, and try again.
The IC's are hard to identify as the text is small and can disappear in certain light. I used a mobile phone in camera-mode to easily identify the chips and there locations.
Each IC slipped into place with little effort. Once fitted, I checked the parts against the image included in the instructions. All good.
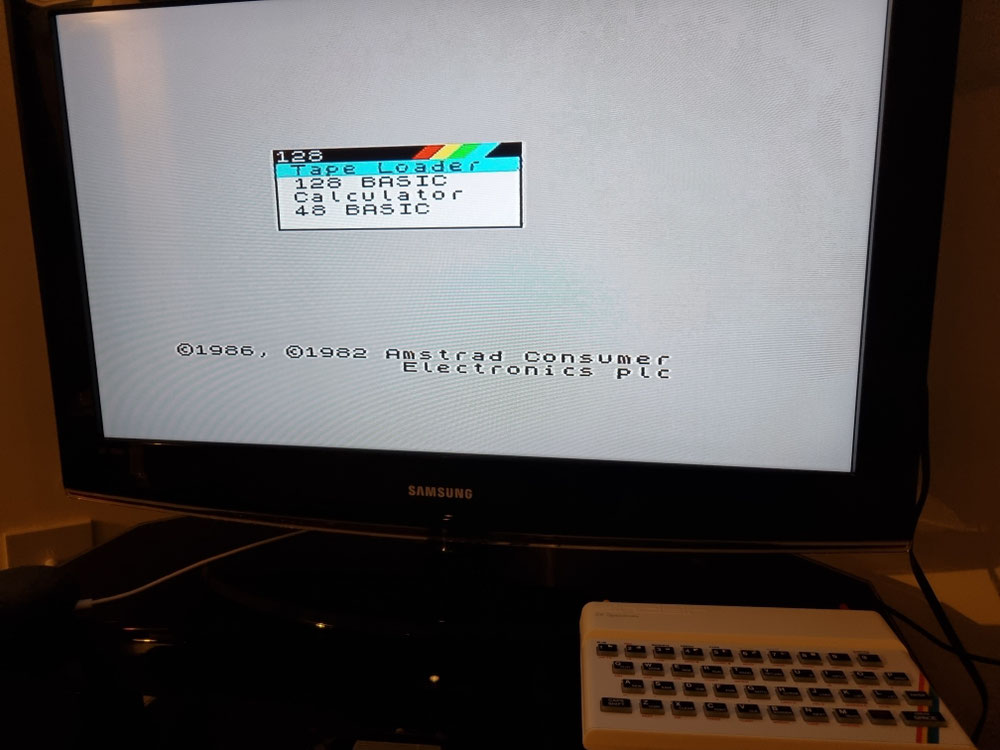
First test
It worked first time! The kit supplied by Bytedelight comes with a ROM chip included, but this chip does not have the ZX Spectrum operating system installed. Out of the box, my ROM chip was preinstalled with an iconic 80's game. This is the ROM chip I installed for the first test. You can flash this chip yourself with the Spectrum Operating system ROM of your choice. Or, buy a pre-programmed ROM from Bytedelight or eBay etc.
Using the PAL output, I connected the ZX spectrum to my TV using a phono lead. No keyboard connected.
I connected the PSU and switched it on. To my joy the screen lit up and I could see the game running. Brill. The care and attention had paid off.
Next I fitted the ZX Spectum ROM chip and bingo! All systems go.
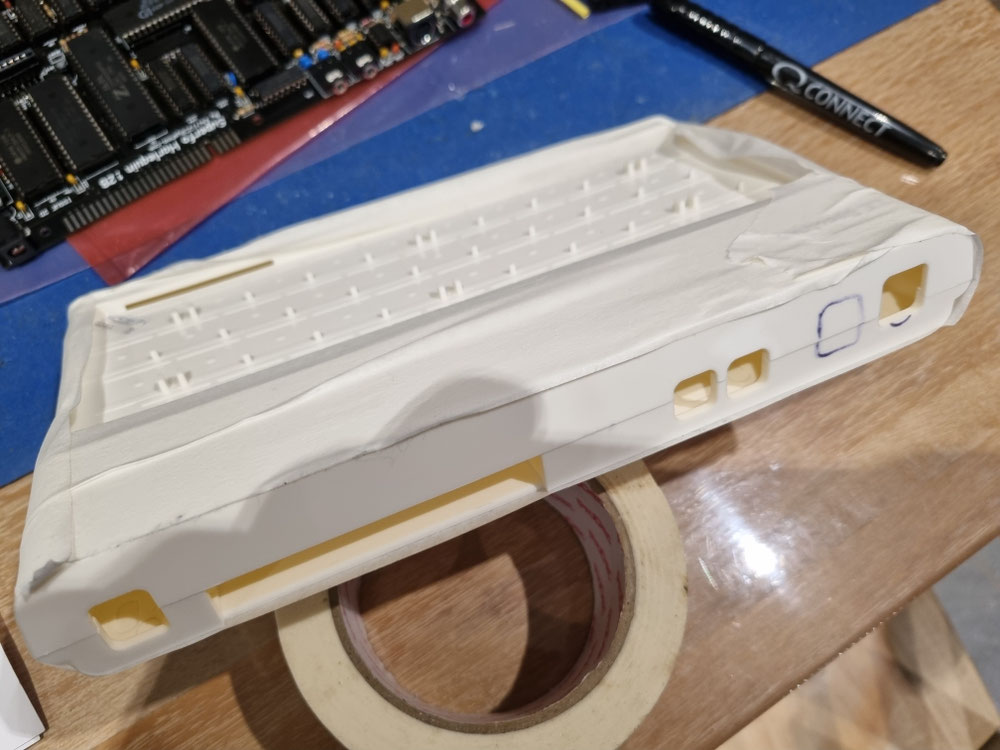
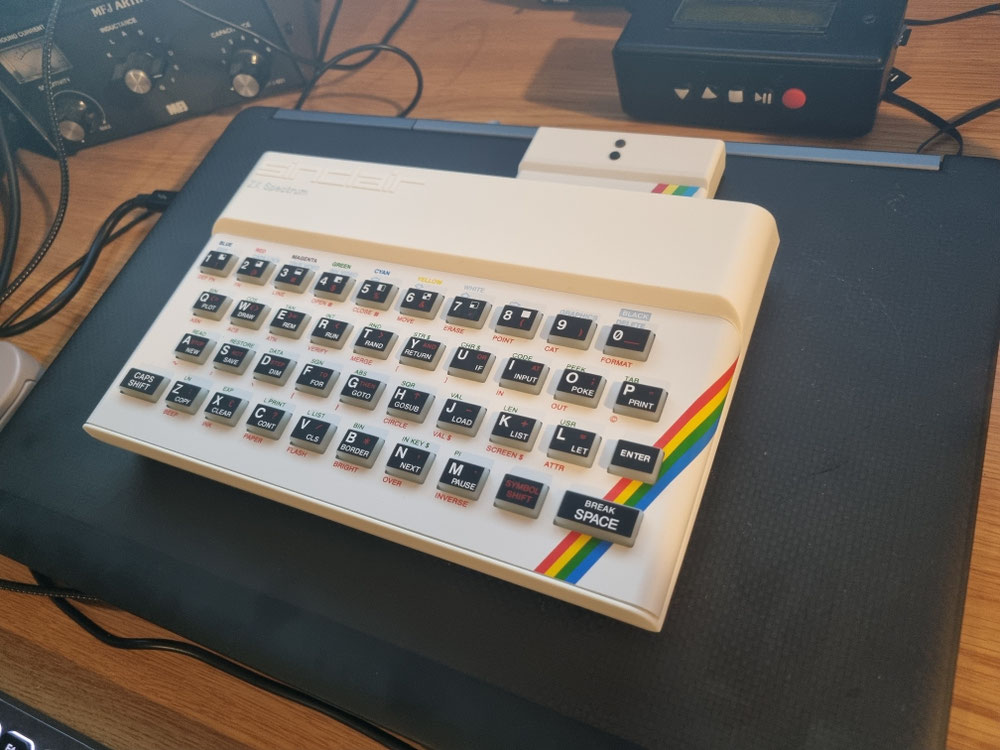
Modifying the case (for the reset button and RGB output)
Although not entirely necessary, the case will need to be modified if you want to gain access to the RGB output port, and a hole is also required if you are fitting a reset switch.
Before cutting the case I wrapped it in masking tape to protect it from damage. After marking the the case with a non-permanent pen the cutting began using a hacksaw, square file and knife (for deburring). The reset switch hole was drilled.
Reset switch
For the reset switch I used a tiny press switch. I held this in place using clear silicon adhesive to allow for future maintenance if needed.
Assembling the ZX Spectrum keyboard
When assembling the the keyboard it's essential to push the plastic lugs through the rubber key pad, if not, then the face plate will pop off. Other than this it's pretty straight forward. Case, membrane, rubber key pad, then facia.
Using your new ZX Spectrum
Add an SD card reader
To load files in to your Spectrum you can of course use a cassette player and a cassette. Although fun, it's not the best way to do it. To make your Spectrum even better get a divMMC!
I chose the divMMC Future SD card reader from TFW8b.com. Its small, neat and comes in multiple colours. This device works really well and it's highly recommended. To load a file, just press the button and a menu will appear, easy. It also does much more than this, I'm just providing the most basic description here.
There are other divMMC solutions on the internet, I chose the divMMC Future to ensure I was supporting multiple retro shops with my hobby buying.
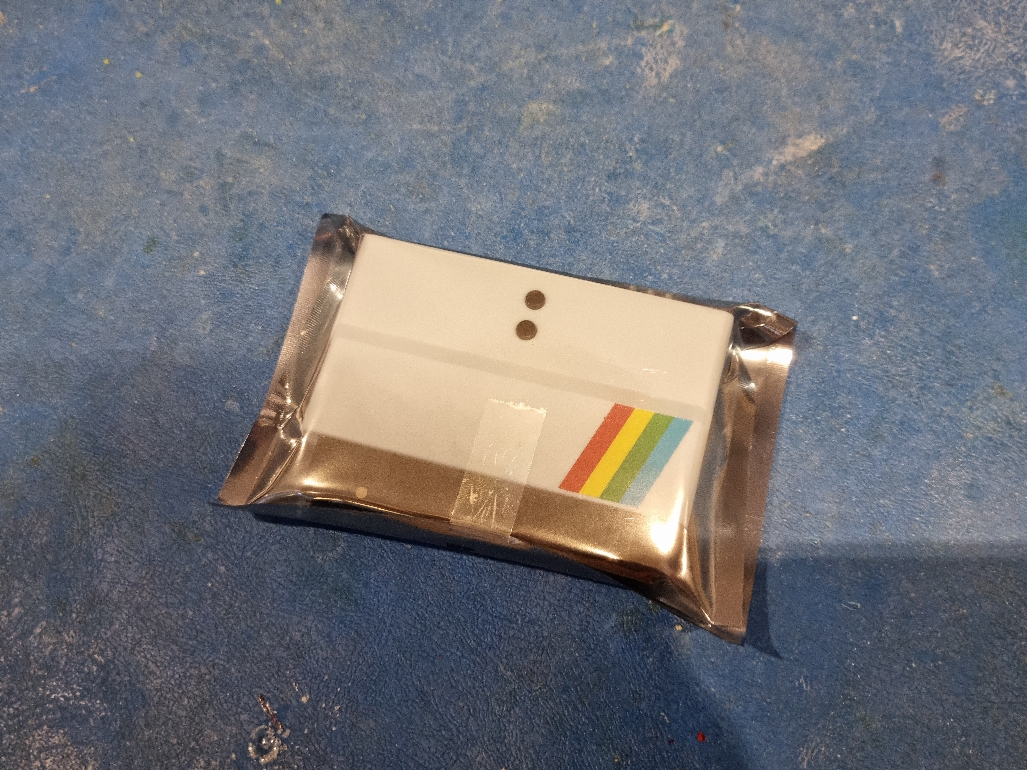
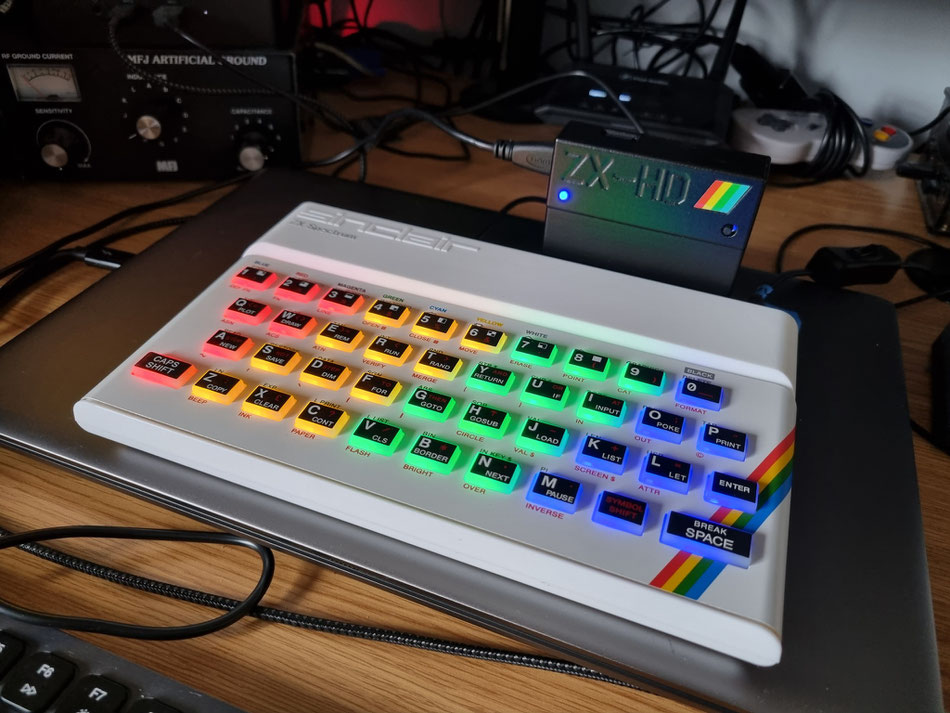
Add HDMI output to your ZX Spectrum with a ZX-HD HDIM interface
The regular composite video out put works fine for testing. But for the 'wow' factor I'd strongly recommend the ZX-HD HDMI interface, also available from ByteDelight. This expansion pack plugs in the back of your spectrum and provides a super crisp HDMIN output.
Also, ULA plus games will work with this brilliant HDMI device! ULA plus adds many more colours to the standard colours pallet making ULA plus games look much less 'primary' and easy on the eye.
Pimp it up with an illuminated keyboard
I enjoyed building my spectrum so much, I just had to keep going.
ZX Spectrum illuminated keyboard kits are available from here: https://zxrenew.co.uk/
The kit provides a cool illuminated look, and nice feeling clicky keys!
Note: This keyboard was tricky to build and setup. I stuck with single level illumination and used a different DC to DC converter to the one supplied, I also installed a small connector into the supply connection to allow easy lid removal.
Final thoughts
I really enjoyed this project! Seeing this 8 bit computer kit burst into life on the first attempt was a great feeling. It took me 10 hours+ to complete, I would not recommend trying to go faster.
The kit and kit documentation was excellent, making the build an absolute pleasure to complete. Great care is always required to ensure success.
I would highly recommend this kit to anyone who enjoys making electronic kits and wants some thing a little special at the end of it.
Return to the QSO Shack Homepage.