
Add a software defined radio (SDR) to your transceiver to make a 'real-time' panadapter
A panadapter allows you to see all of the radio stations currently transmitting across an entire band. When working HF, this is very useful as it allows you to quickly home in on CQ calls and other activity.
SDR radios are relatively cheap and available, these will provide a spectrum view right out of the box, but on their own, this isn't enough. How do you connect your antenna to both your transceiver and SDR? Unfortunately, it's not possible to simply attach an SDR directly to a transceiver. SDR radios can be damaged by transmitter power when an SDR and transceiver share the same antenna.
A switch can be used to flip between SDR and transceiver, but this prevents the use of your main receivers audio signal making this setup a bit awkward.
One way to connect an SDR and transceiver is by using a relay box to disconnect the SDR when transmitting automatically.
This page describes how to safely connect a software defined radio to your transceiver using a DXE-RTR-2 relay box to create a real-time spectrum analyser (panadapter) to your shack.

What you will need to add an SDR panadapter
Before you begin you may need to do some shopping, the equipment required to make all this work is listed below:
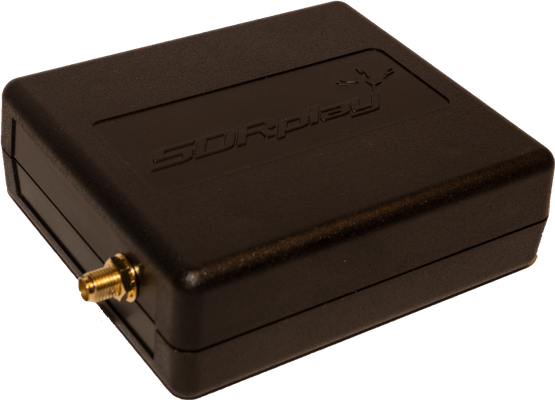
- SDRplay software defined radio (http://www.sdrplay.com/)or similar wideband SDR
- 1x BNC to SDR cable
- DXE RTR-2 (https://www.dxengineering.com)
- Twin red/black wire to make power lead for DXE RTR-2 (not supplied with the RTR)
- In line fuse holder
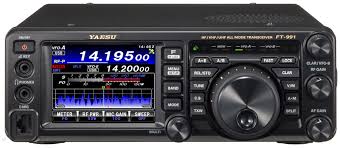
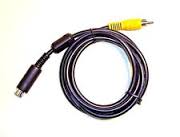
- Linear amplifier PTT/switching cable Yaesu FT-991 - Phono to din plug
- 2x BNC cables (50 ohm)
- RF splitter (50ohm) - Tip: Must be a 50ohm RF splitter
- Yaesu FT991 transceiver(or similar)
- A Windows PC (able to run your SDR)
- SDR console software (http://sdr-radio.com/)


Some preparation may be needed...
The DXE-RTR-2 does not come with a power lead, only the connector is provided in the box. So a power lead will need to be manufactured at home, be sure to include a small fuse to protect the device. Making the lead is simple, but it's annoying if you haven't got any wire, etc. so it's good to prepare for this in advance.
There should be no need to change any jumpers on the DXE-RTR-2 as delivered from the factory set up ready to support the configuration below.
Note: Remember that the SDR radio will require a good USB supply, this can be an issue if you already have lots of other devices connected to your PC. External supplies can cause noise, so it's good to consider the standard of your PC's PSU.
Connecting up the DX-RTR-2 to the radios
The diagram on the right is taken directly from the DXE-RTR-2 user manual. It shows the basic connections required to interface the DXE-RTR-2, SDR, and transceiver. The setup is very simple but must be made correctly for this all to work:
- Your antenna connects to the main antenna socket
- Your transceiver connects to the Radio connector
- An RF splitter joins the two receive antenna BNC connectors together
- The remaining RF splitter connection goes to the SDR
- The PTT O/P lead must be connected between the RTR-2 and transceiver.
Wire management is a problem because this set-up introduces a lot of extra cables into the shack. Keeping everything nice and short can help, being aware of this in advance may help plan for this.
I have this setup using an SDR play and Yaesu FT991, the connections straightforward and does not interfere with my SignaLink sound card connection or PC USB control cables.

Setting up the SDR software
The SRD console software will synchronise the tuned frequency between the SDR radio and transceiver. This allows for 'point and click' tuning directly through your PC or via the tuning dial on your transceiver. To access this feature, click on the '?' symbol in the 'External radio' window on the left sidebar in SDR console application. The settings required to synchronise the SDR and the transceiver can be found here.

Switching on for the first time
Note: To save your SDR (just in case there is an issue) keep this disconnected when first testing!
The RTR-2 panel switches should be set as follows:
- The RTR-2 power should be on and the Green power LED should be illuminated
- The RX ANT switch needs to be in the centre position, the LED will be blue
- 'Option' should be set to off
When the PTT switch is pressed, the RX ANT LED should turn red, indicating that the relay has switched out the aux antenna circuit.

If this does not happen as expected then check your wiring and software setup etc. before proceeding.
If all is OK and operating as expected then connect your SDR and start the SDR software. You should see the radio spectrum displayed on your PC and your transceiver should track the frequency as set on your SDR (and vice-versa).
Summary
Adding a panadapter to your shack can really enhance HF work. Being able to use an SDR to achieve this offers the operator a real-time high-resolution image of the entire band. The DXE RTR-2 is a high-grade relay box which can do much more than discussed here. I'm very pleased that I have chosen this option for my shack, this panadapter setup will be hard to beat.
Return to the QSO Shack Homepage.