
Go digital with a Dvmega, Raspberry Pi and Pi-Star
Make a reliable Pi-Star hotspot to access those digital modes at home
Many radio users have wound up with D-Star, DMR or System fusion capability bundled with a radio that they have acquired at some point. Digital repeater coverage is not guaranteed, leaving many without the ability to use this digital mode technology. But there are ways to gain a digital connection by using your own digital hot spot!
A hot spot acts like a very low power repeater, typically 10mW, connected to your own internet.
There are a number of digital hotspot solutions on the market, some work right out of the box, some need to be plugged into a PC and some require the use of a Raspberry Pi or a Blue Stack Micro. Here we will talk you through the DV-Mega and Raspberry Pi solution.
This page does not intend to replace the materials already freely available on the internet, it's simply merely place all the resources required in one place, while also providing a clear overview of the assembly and setup process.
Why Pi-Star?
Firstly it's reliable. It's also simple to use, free and it works!
What more could you want?
You'll need a Dvmega and Raspberry Pi, but that's about it
I made two of these units, one based on the original Raspberry Pi and one based on the version #3 model. Both worked well, the later Pi version offered faster boot up time and more responsive O/S navigation. If you can, go for the later Pi model.
Hardware required for this project:
- DV-Mega (http://www.dvmega.co.uk/)
- Antenna (for DV-Mega) - Single or dual band
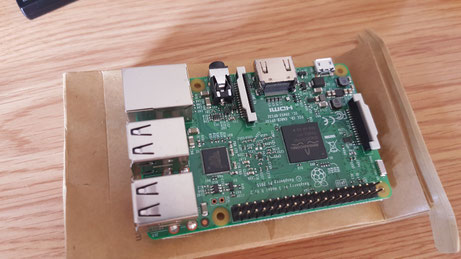
- Raspberry Pi (any version)
- 16Mb SD card
- WifI dongle (if not built into the Pi)
- Power lead for the Pi, 3amps
- Plastic Pi enclosure
- 3 Amp PSU
Tools required:
- Windows PC
- SD card programming dongle or slot
- Epoxy glue (for 2&3 Pi versions)
Image download:
- Pi-Star image
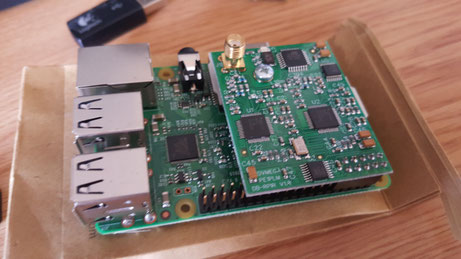
Assemble the hardware - Simply fit the Dvmega to the Pi
The Dvmega comes with basic fitting instructions which explain how to fit the modem board to the Raspberry Pi. The Dvmega board fits directly to the Raspberry Pi as shown below, it's straightforward to install.

The Dvmega board is supported by its connector socket with the use of a small support spacer. This spacer screws through the PCB on the early versions of the Raspberry Pi, with later models this spacer will need to be glued to the PCB.
Before gluing, first, fit the support post to the Dvmega, apply the glue the base of the post, then placed the board in position. I found that I had to fit an extra washer between the Dvmega and the support post as the spacer supplied was not quite long enough. I initially used super glue to attach the support post, this did not work at all. I then used epoxy glue which was much better and worked well.
I observed ESD precautions when handling the Raspberry Pi and Dvmega boards. It's probably worth avoiding any potential future issues.
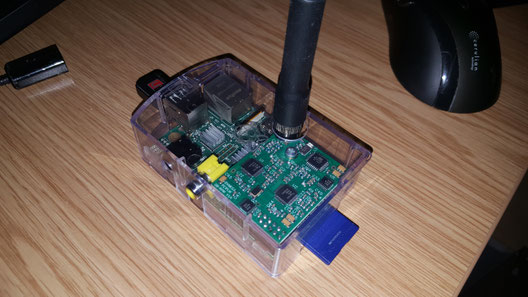
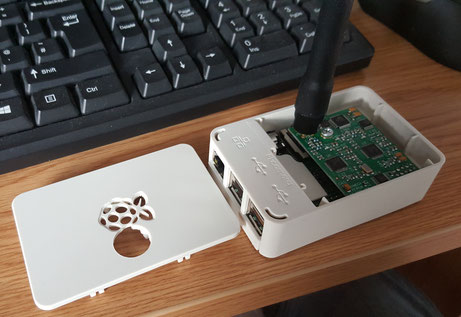
Modify the Pi box to make space for the antenna
You are going to need a box to protect your digital hot spot. There are plenty on eBay and Amazon, I avoided the metal cases to avoid issues with the built in WiFi (Pi3 only). Most Pi enclosures will accommodate the Dvmega PCB, but do think about this before purchasing.
Whichever case you choose you're going to have to drill a hole for the antenna. Accuracy is very important when drilling the antenna hole, so it's worth triple checking before drilling. Identifying the correct position on a clear case is easy, however, if your case is not clear then some thought will have to go into identifying the correct position. A small pilot hole will allow for a sample check to be made before committing to the final cut. A 16mm hole cutter will make a clean cut in most materials and should leave you with just enough space to fit the antenna. No other modifications are needed.
Flash the PiStar image on to the SD card
For the next step you will need to flash your SD card with the PiStar image: https://www.pistar.uk/downloads/ . Full setup instructions are provided on the PiStar page. It's important to follow the instructions to the letter to avoid problems, they are very well written and easy to follow so this should not be a problem.
The basic installation procedure is outlined below for reference:
- Download, unzip the PiStar image
- Write the PiStar image to your SD card using the recommend image utility
- Connect the Pi to an Ethernet cable on you local network (back of your home router will be good for this), connect power
- Once the Pi has fired up, go to: http://pi-star.local/admin/ to login. Easy.
- That's it!
Setting up Pi-Star is very easy to set up
There are lots of instructions available on the Pi-Star website and the internet . Here are some tips which may be useful:
General
- You'll need a really good 3Amp PSU for this to work reliably
- Don't forget to select your modem type in Pi-Star
- Set mode to 'Simplex' for Dvmega
Dstar
- Radio will need to be programmed with a designation M0XFL<space><space>B
- Pi-Star RPT 1 should also be set to B
- Set your radio to DV repeater, not simplex
- D-Star registration page is here: https://regist.dstargateway.org/Dstar.do
YSF
- There is no registration required for YSF
- You'll need to switch on a reflector service

Hotspot connection range was impressive
The Dvmega website says the unit is fitted with a 10mW transmitter. A range of about 100 metres can easily be achieved with the stub antenna supplied with the unit (with limited obstructions etc).
I installed a full size handy antenna to the hotspot to increase gain and range. I got a line of site range of >500m!
I don't know why anybody would want to do this, but it was fun to test these things.
Summary
I have really enjoyed this project. These modes offer a whole new dimension to this hobby which most people will enjoy a lot.
My hot spot is located in my loft space and remains switched on because it's always in use. To dismiss digital modes is probably a mistake.
The Dvmega with a Raspberry Pi offers a great way to explore a modern mode without relying on a local digital repeater.
Pi-Star is very easy to use and setup. A great project and highly recommended. Yes, I strongly recommend getting a radio equipped with digital modes and giving this a go.
Return to the QSO Shack Homepage.